

Product Setup
The following article details the steps needed to set up products in your vendor account. Please note that once products are set up they are NOT live. Please contact your Business Development Manager or Account Manager before adding or changing any products in your account to ensure that everything is approved by Compliance and Tech Integrations.
1. Navigate to the Setup tab from the Dashboard
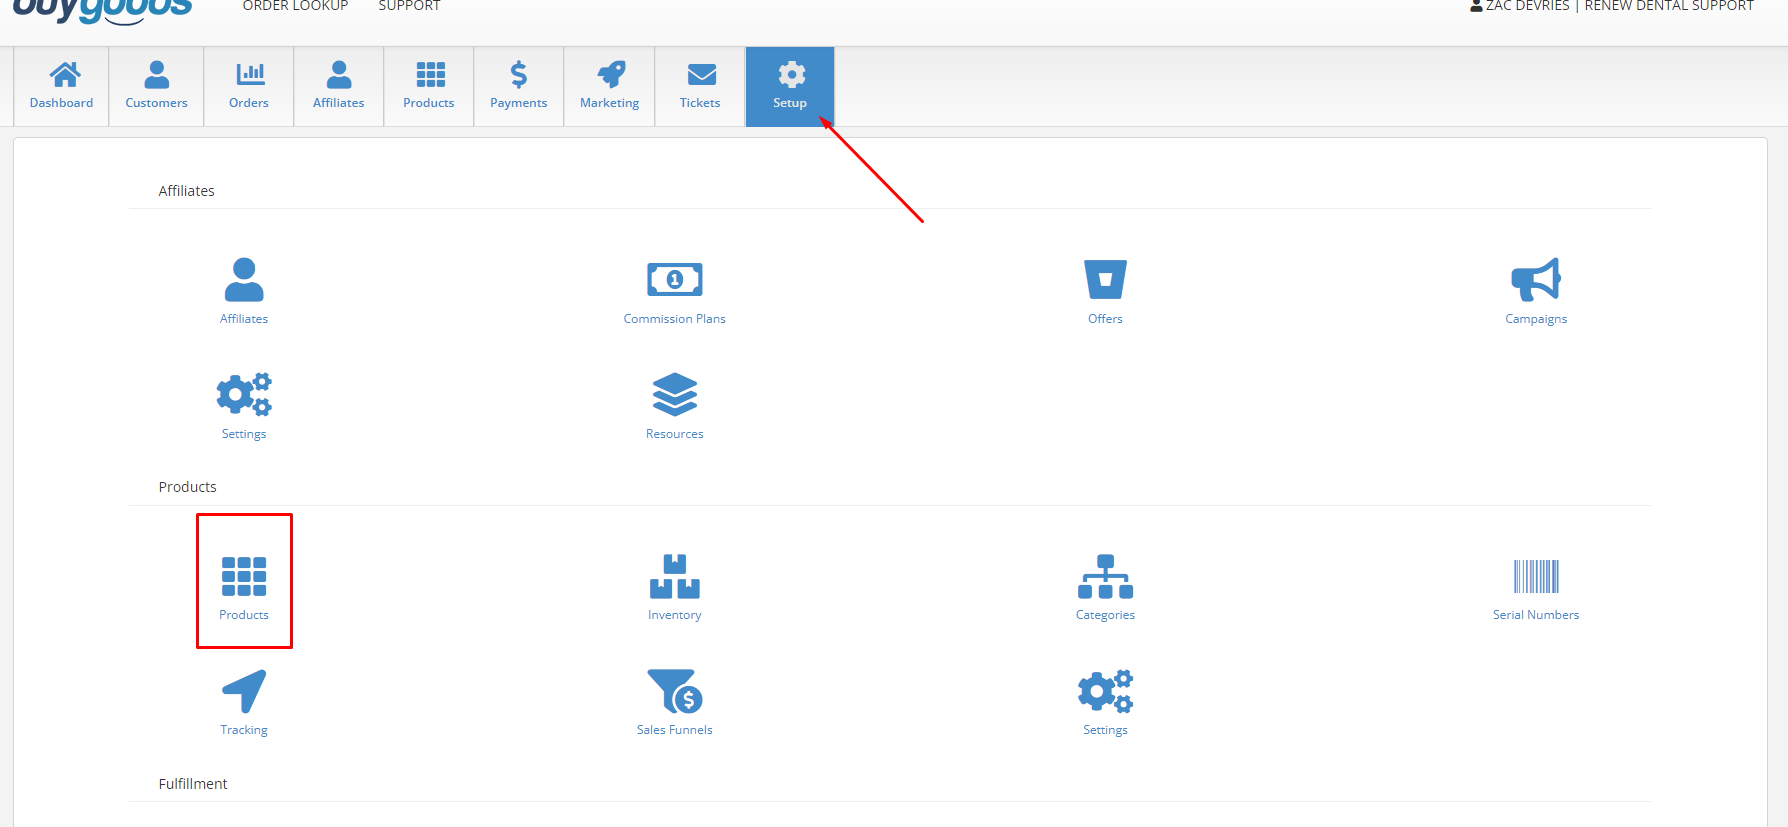
2. Setup > Products
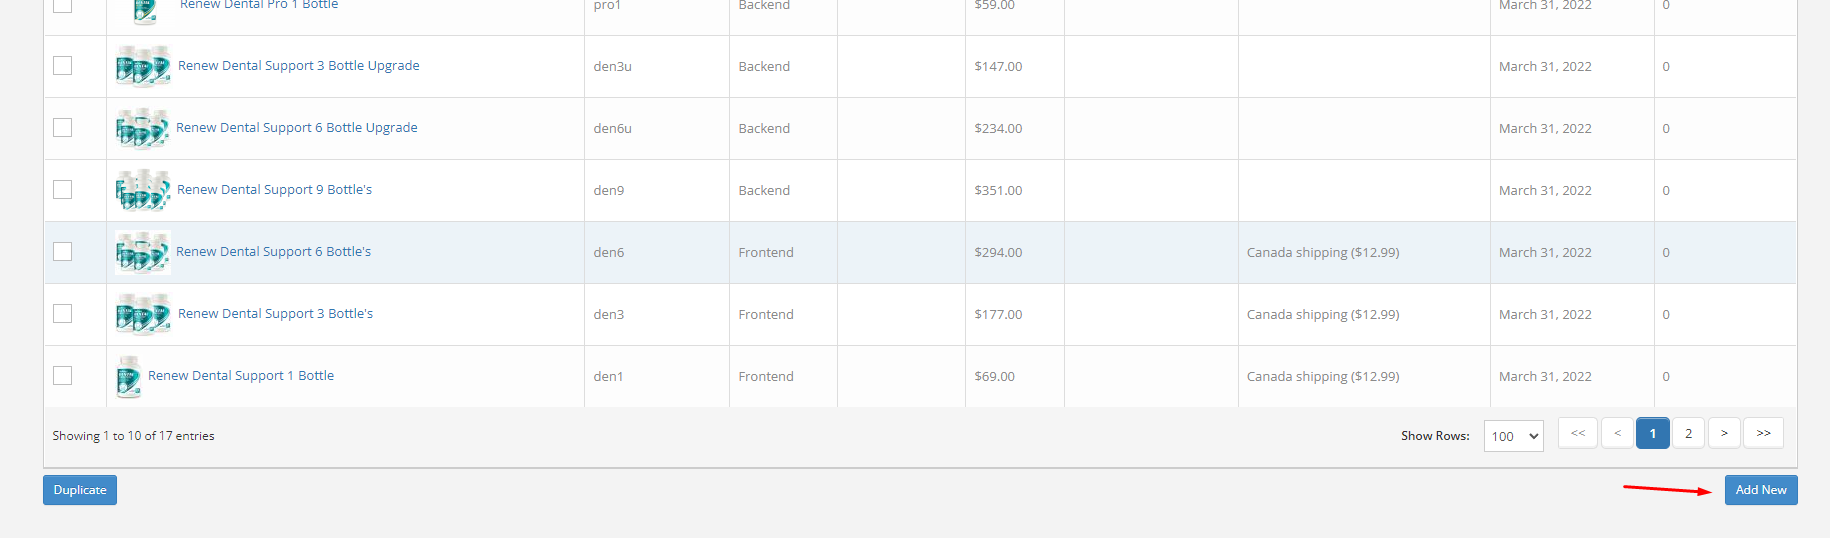
3. Select Add New
Breakdown of Areas
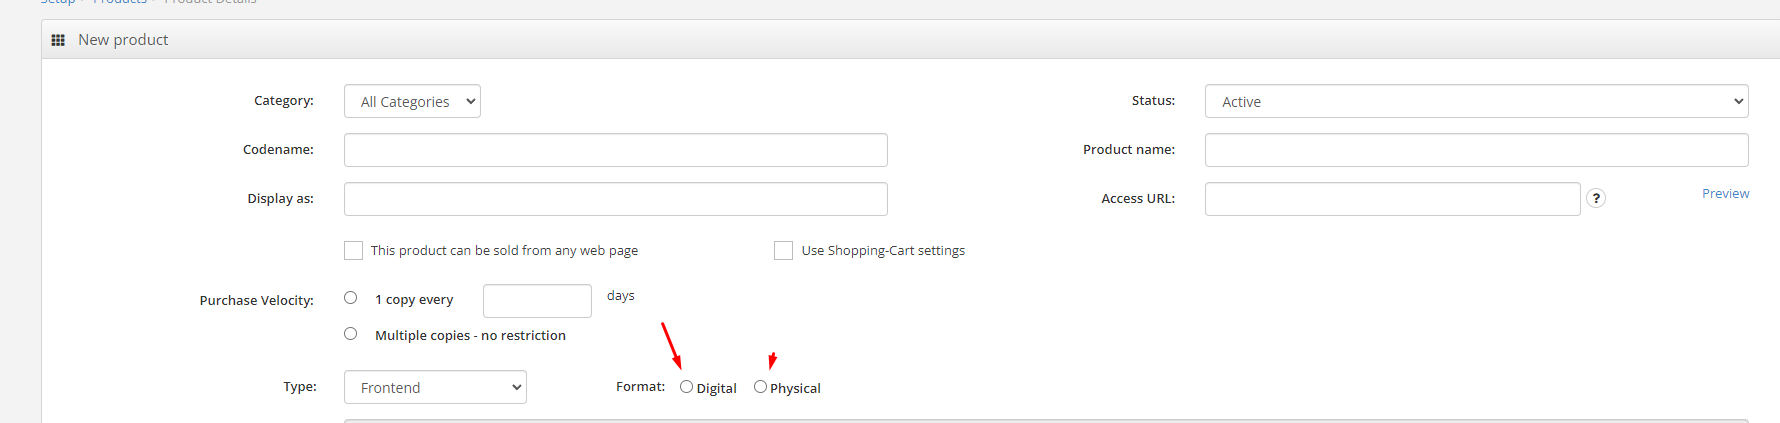
Category: All Categories
Status: Active, Inactive, Abandoned, Testing, Deleted.
Codename: A unique identifier for each product. Please be aware, you won’t be able to edit this field after you click Save. We recommend using a series of lowercase letters and numbers (especially if you offer one, three, and six bottles of the same product) relatable to the product. No spaces are allowed and the code name is unique for each product (including upsells.)
Ex) greens01
Product name: The full name of the product being sold.
Display as: the name displayed to affiliates and others to see.
Access URL: this is required for digital offers for instant access to product or membership site. This is NOT the sales landing page URL for the product. Customers will be able to access this link through the BuyGoods Thank You Page.
This product can be sold from any webpage: please leave this unchecked.
Use Shopping-Cart settings: please leave this unchecked.
Purchase Velocity: this is how often the same buyer is permitted to purchase the product. Choose "Multiple copies - no restrictions" if the same buyer can purchase the product as many times as they want.
Type: Frontend is the main offer of a funnel, backend is for any upsells or downsells in a funnel
Format: Digital or Physical. This is very important because Physical will have extra areas to fill out to ensure proper fulfillment of orders.
Fulfillment House: what company is processing your orders. This is required for setting up physical products. You can read more about our fulfillment houses here.
Vendor SKU: Input the SKU of the offer and fulfillment house here. If the product SKU includes a quantity you can leave the "Qty" field blank. If your product SKU does not include a quantity (as seen below) then input the product quantity amount in the Qty field.
Recurring SKU: Recurring SKU is an option for vendors when they have a subscription product where the product sent after a specified time period is different than the original product. For example, a customer purchases a one bottle supplement and after a month they then receive two bottles.
Product Description: tell us about your offer.
Product > Physical
Product > Digital
Hit "Save" before exiting from your product to complete the process.
After you have completed creating a product, you can go in and add an image to the product using the following steps.
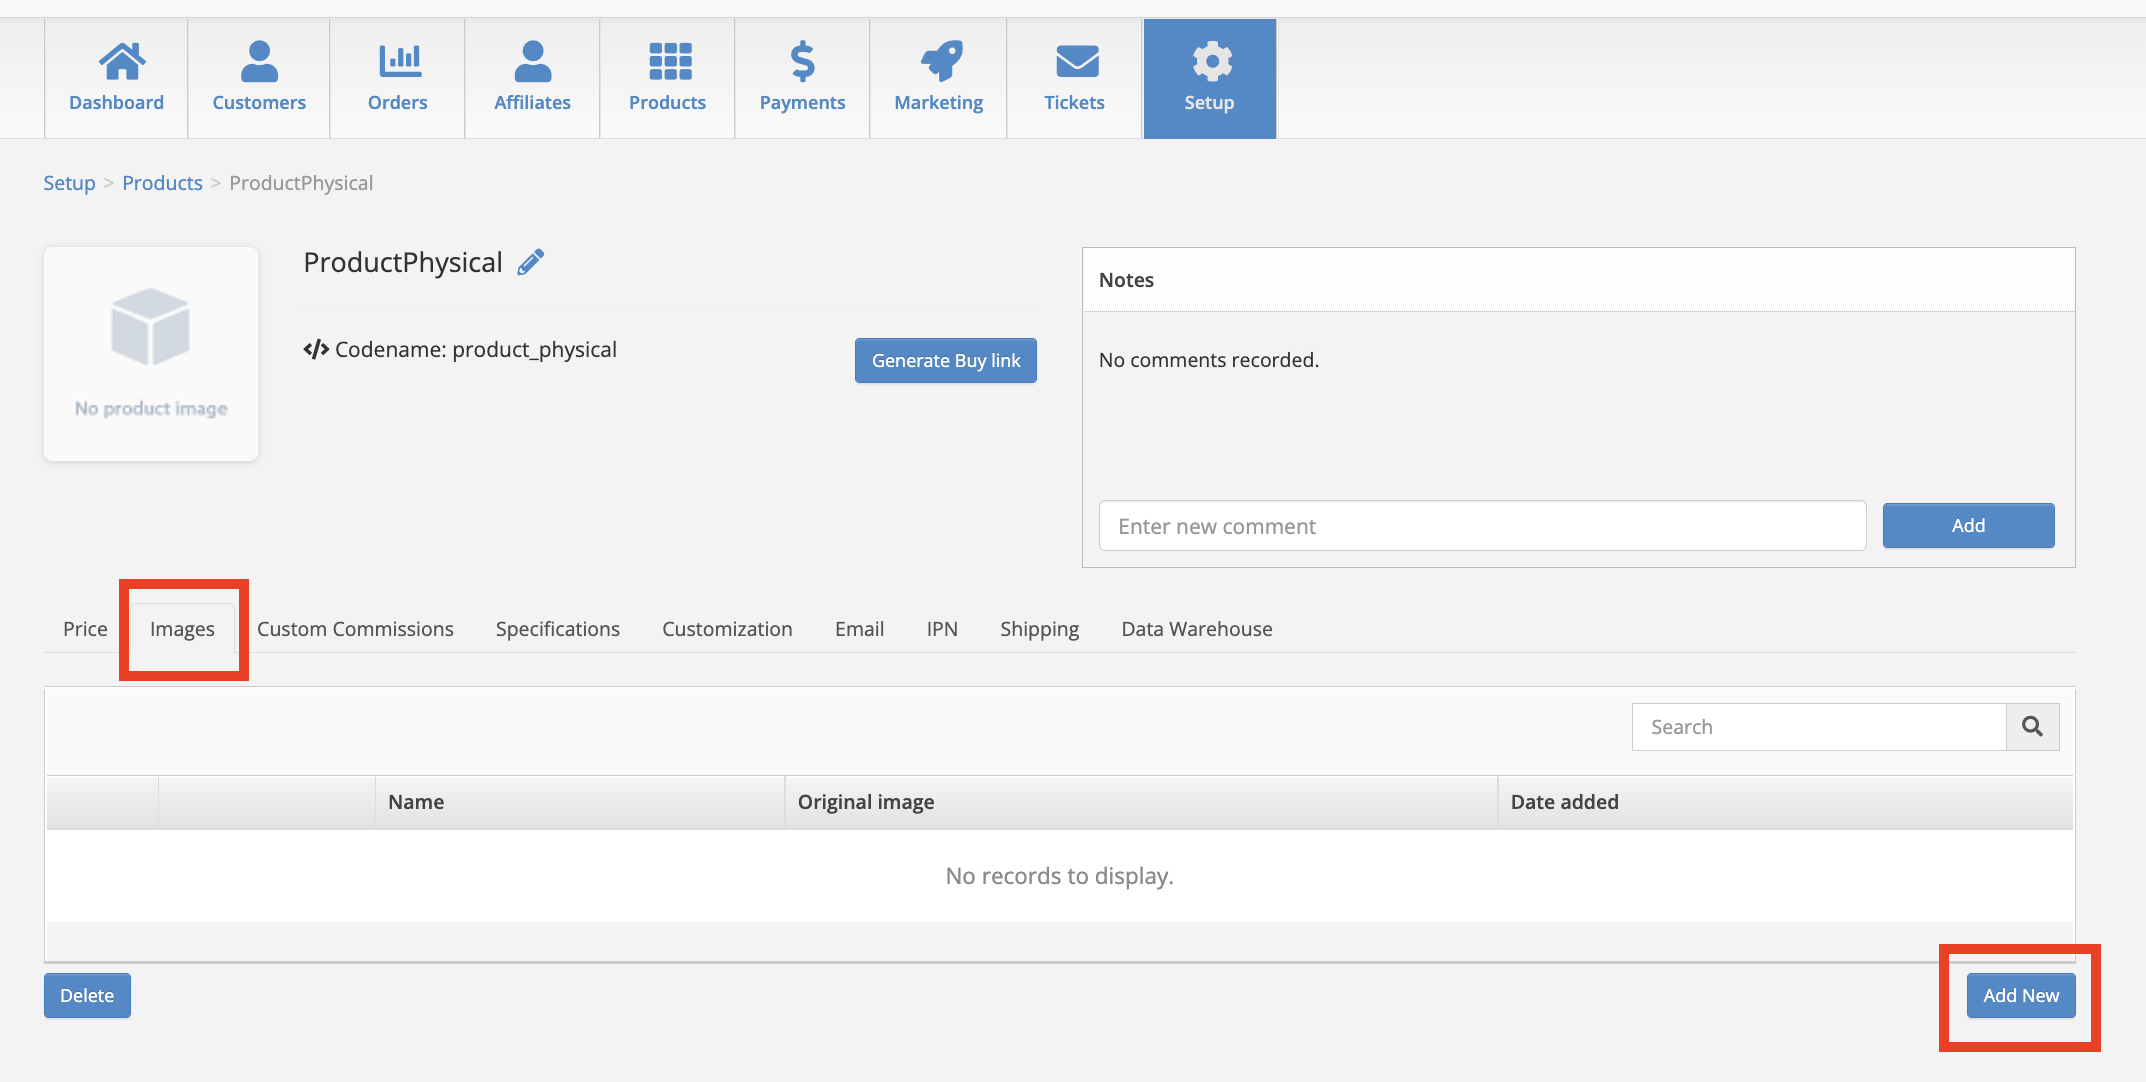
Click on the product you want to add an image to.
Go to the Images tab and select "Add New"
Upload your image
This must be a minimum of 800x600 pixels and should reflect the product being sold.
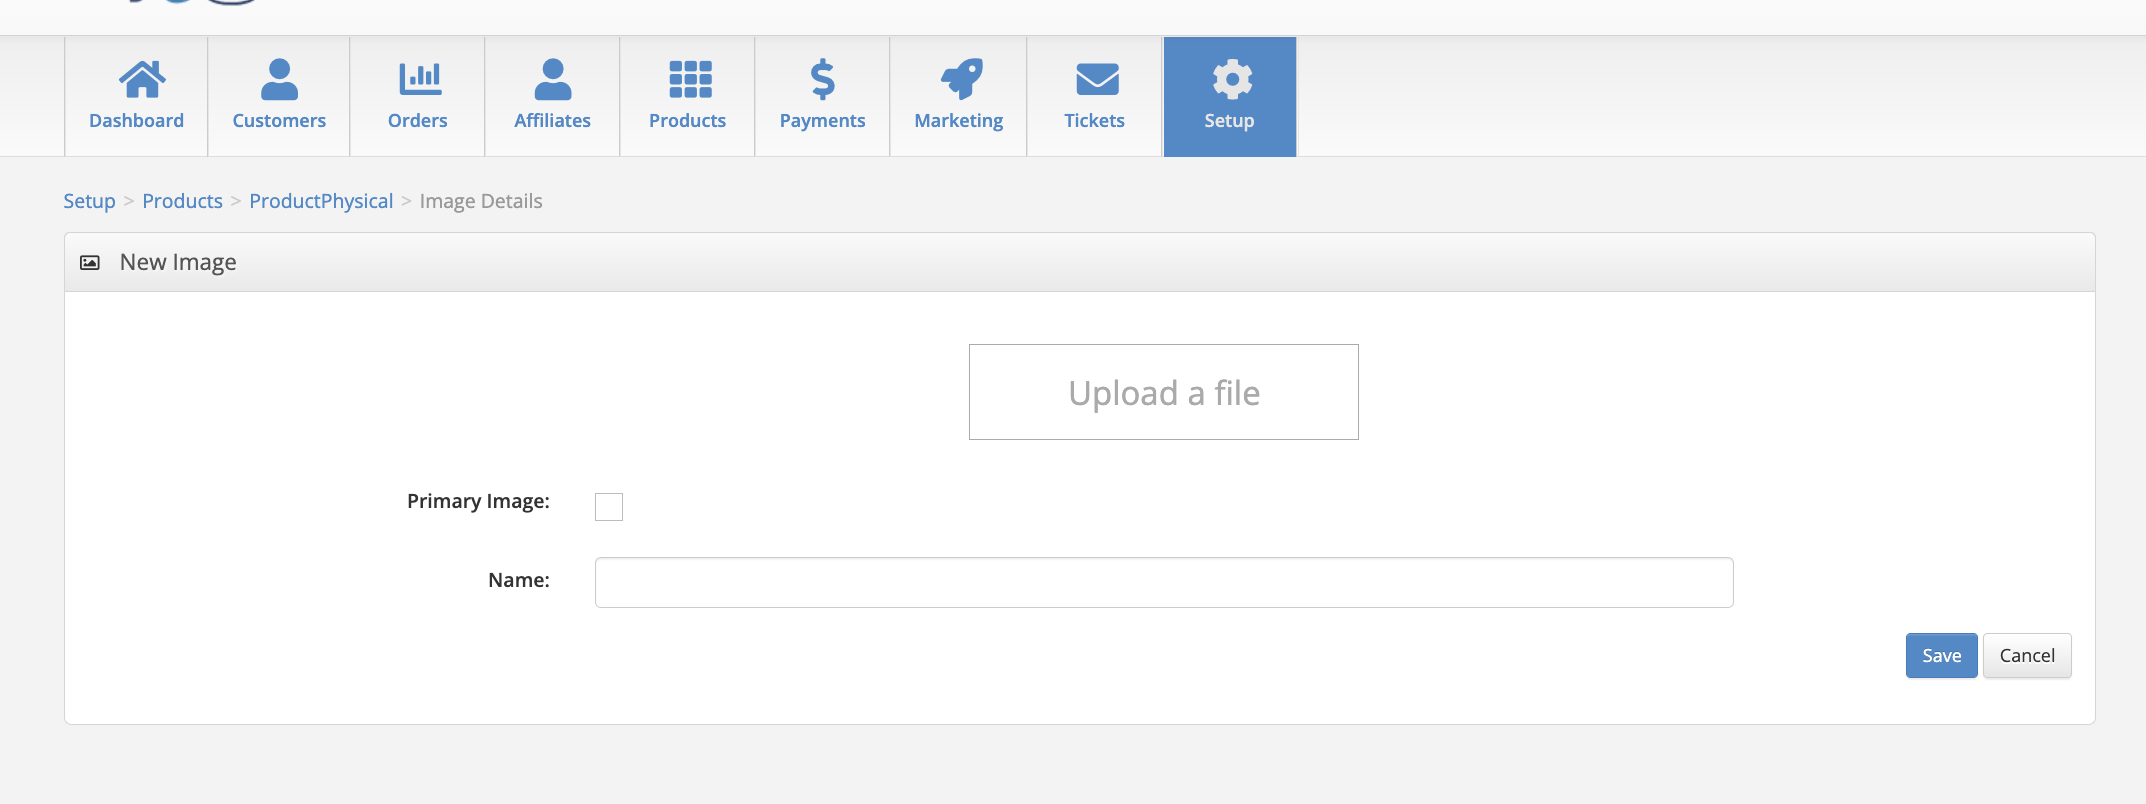
Hit Save before exiting.
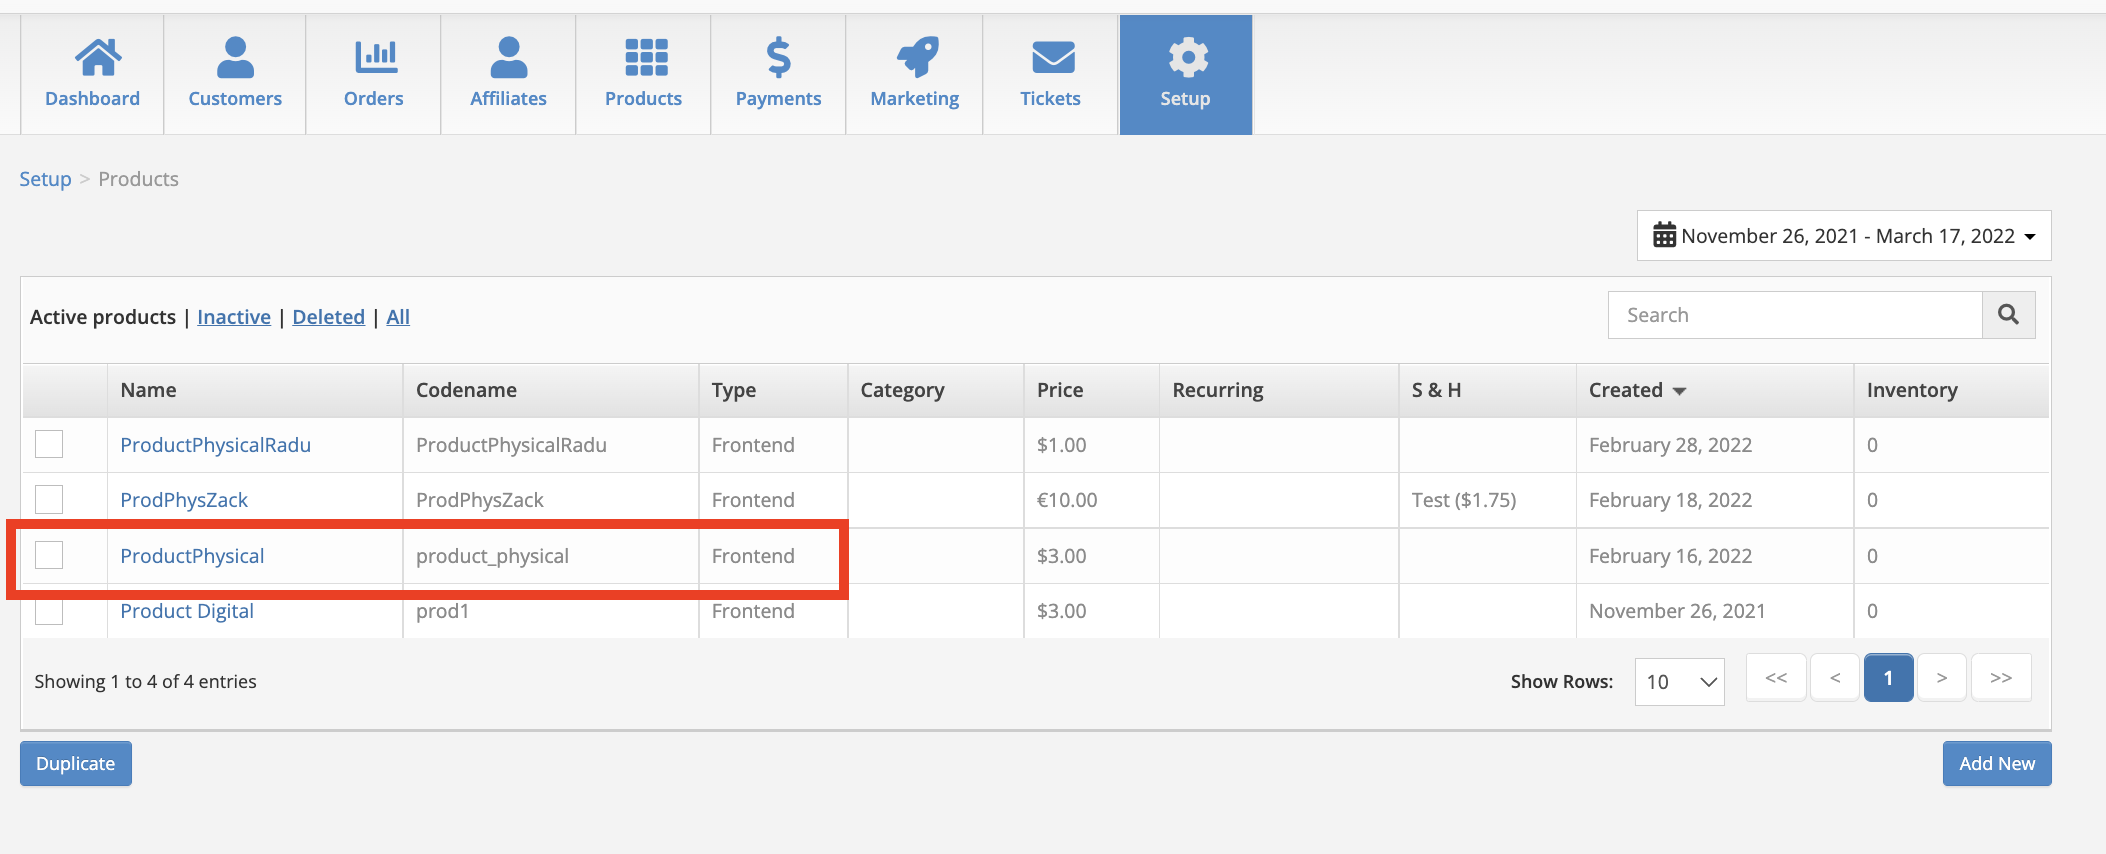
To edit existing products
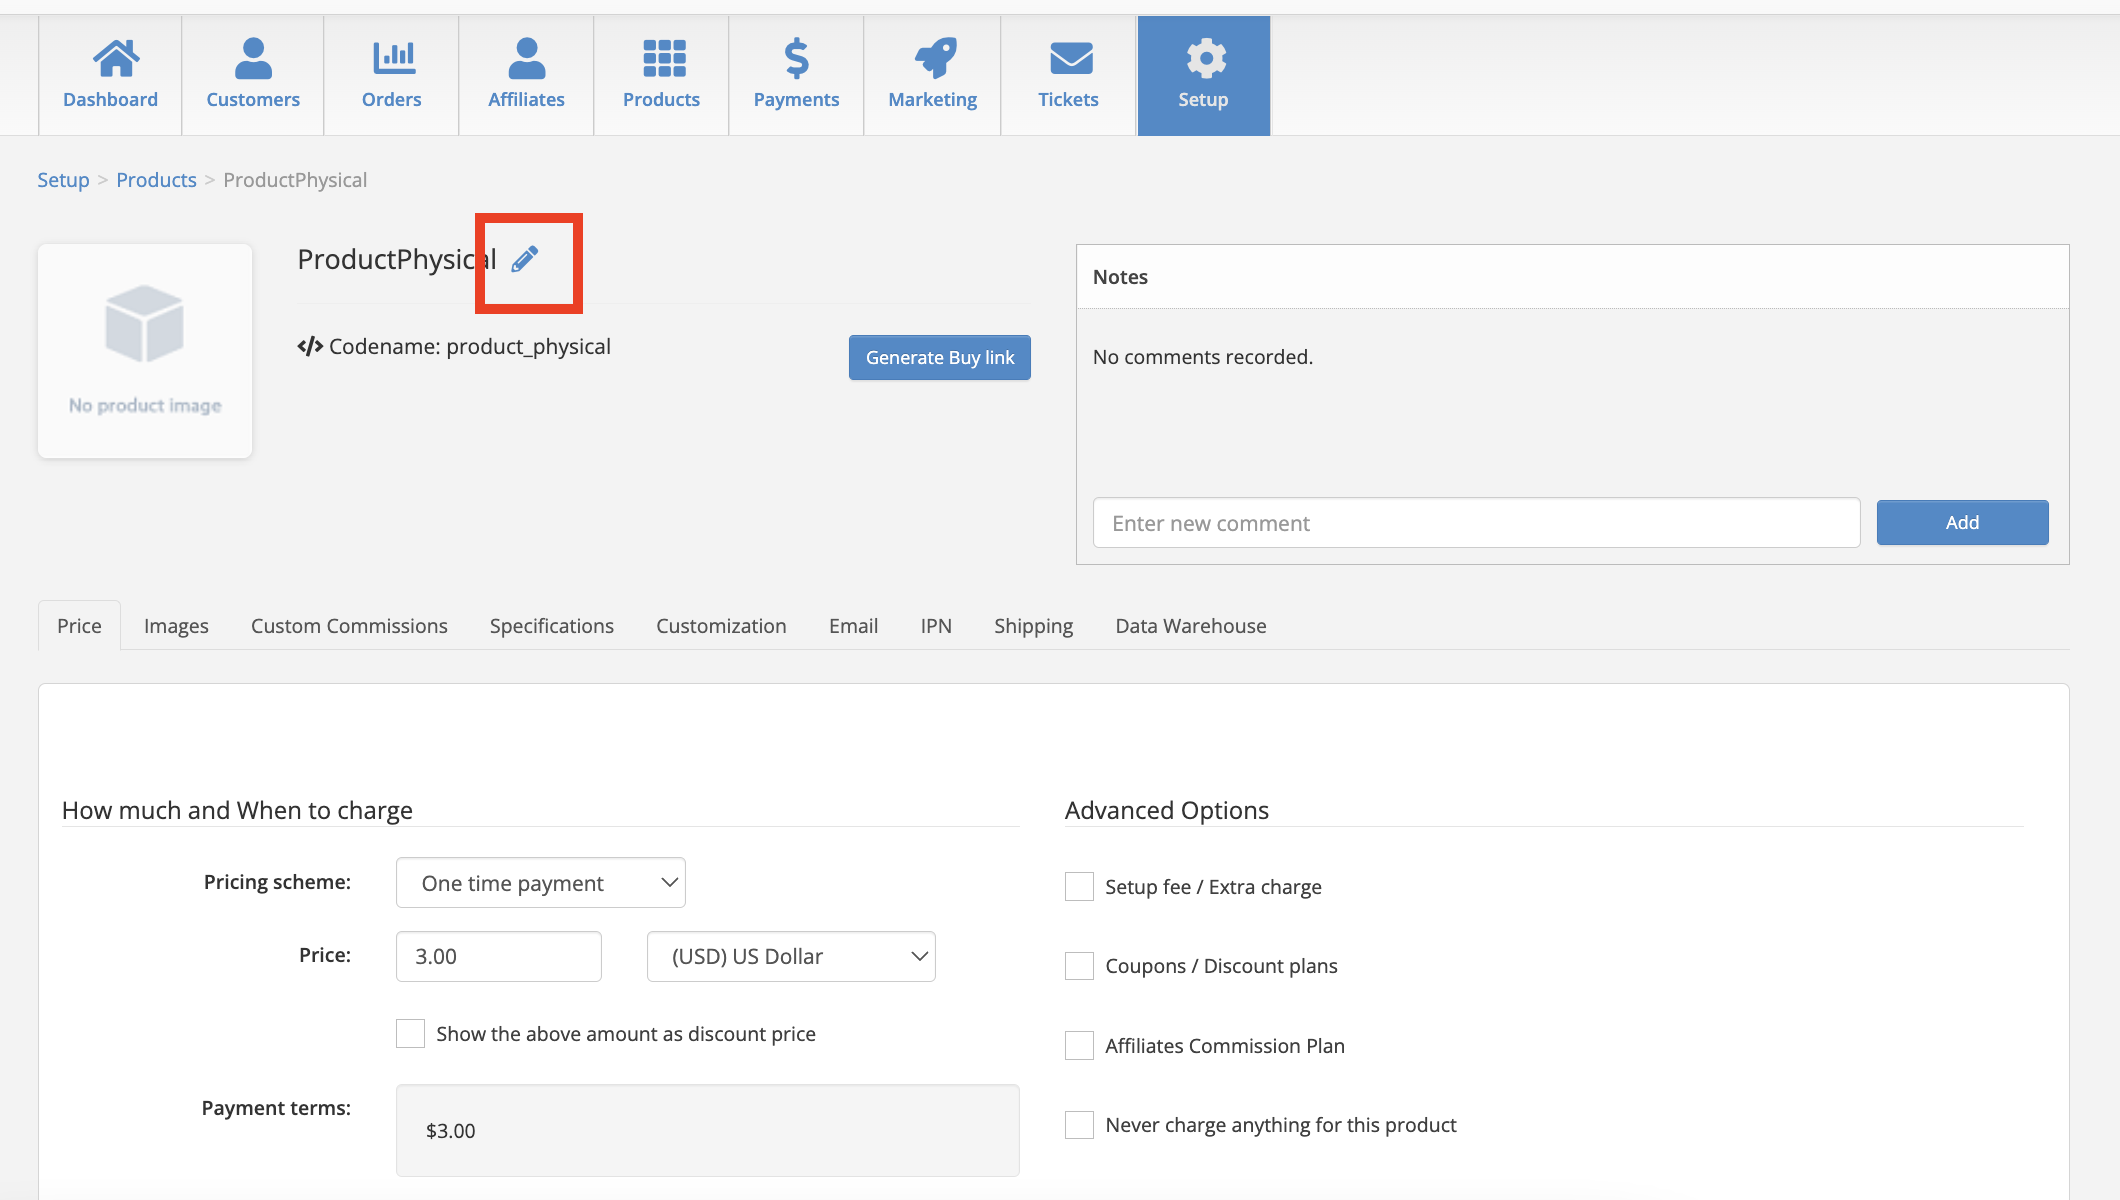
This will bring you back to the original view for creating/editing products.
Hit save before moving on.
Important:
When you are done creating your products, they are NOT ready to run traffic to. Please ensure you contact your BDM or Account Manager to be put in touch with the Tech Team to integrate our system with your landing pages and fulfillment house. A detailed breakdown of how to do this can be found in our Tech Integration documentation.