

Integration Process
This documentation was created with frequently asked questions about our tech integrations process.
Account Creation
Our tech team will create your account using the email that you provided on the Vendor Onboarding Form. Please note, that each offer that is onboarding will need a different email address.
Fulfillment Integration
Please ensure you have your Fulfillment House set up for physical products before proceeding to the Product Setup Setup. In-depth documentation on the Fulfillment House setup can be found here.
Product Creation
All front end (main) and back end (funnel) offers but be set up as separate offers in the account. This is also based on quantity options. For example, if you have the main offer with 1 bottle, 3 bottle, and 6 bottle options, you will need to create separate products for the 1, 3, and 6 bottles.
Please see this article for a details breakdown of how to create products in your account.
NOTE: Products are NOT live after creation. You will still need to complete the rest of the integration process or work with one of our Tech Team members. Final testing and turning on the checkout page are completed solely from the BuyGoods side.
Integrations
The product's buy links that are generated after a product is created will need to be applied to the buy buttons on their funnel. The tracking will need to be added to the header. The steps to do this are detailed below:
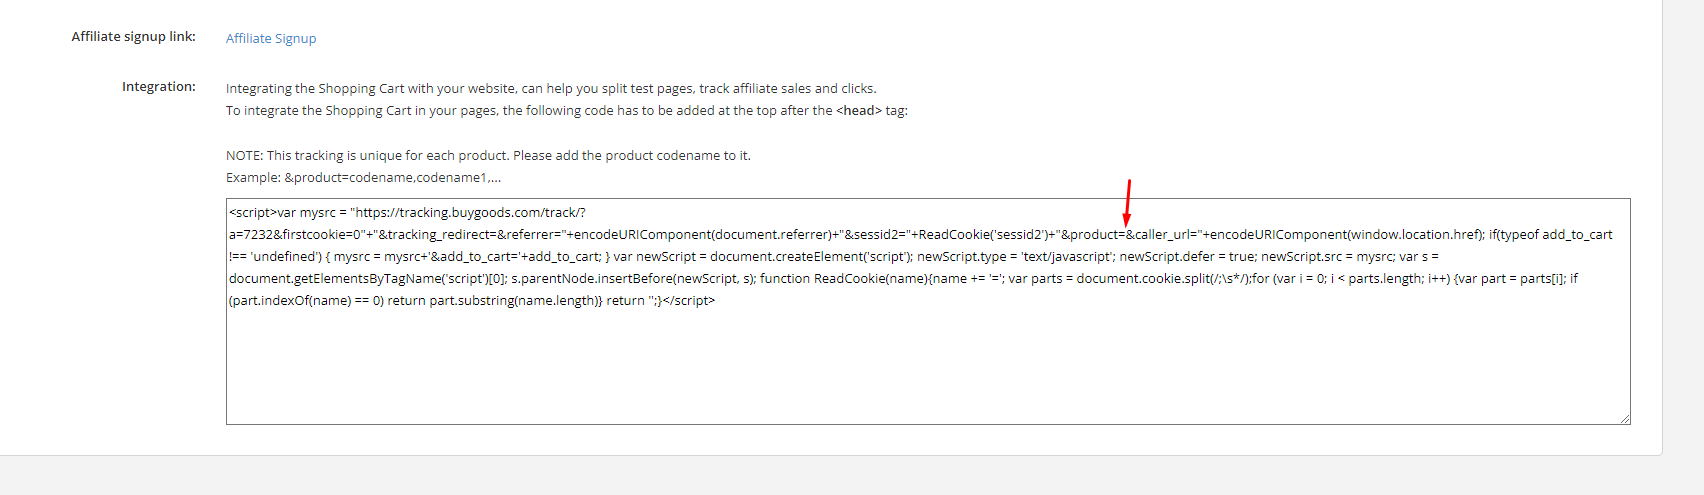
Navigate to Setup > Tracking > Integrations.


This tracking code will go in the header of each page of the funnel based on which products are on the page. This is where the product codenames become important.

The correct way it should be copied.^
Here is where you will place the product code names that are displayed on the product page after you create them. After "&product=codename,codename,codename&sessid2="+ you will place the codenames below depending what products are on the funnel page.
Generating Buy Links
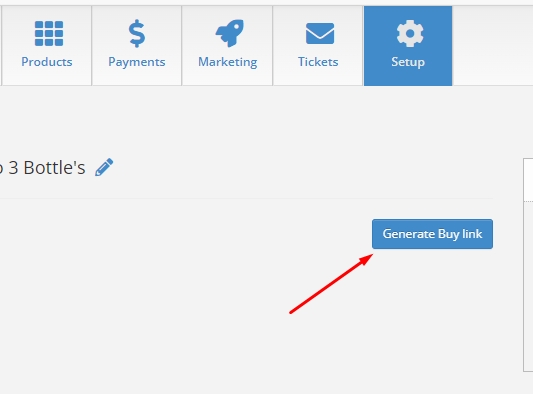
Generating buy links inside of BuyGoods is very easy. Go to Setup > Products and click on the product that is on the page of the funnel add the upsell 1, upsell 2 or upsell 3 links depending on which page you want to follow. This is based on the product codename from the products so please make sure to paste the link that BuyGoods generates to the correct product on the page.
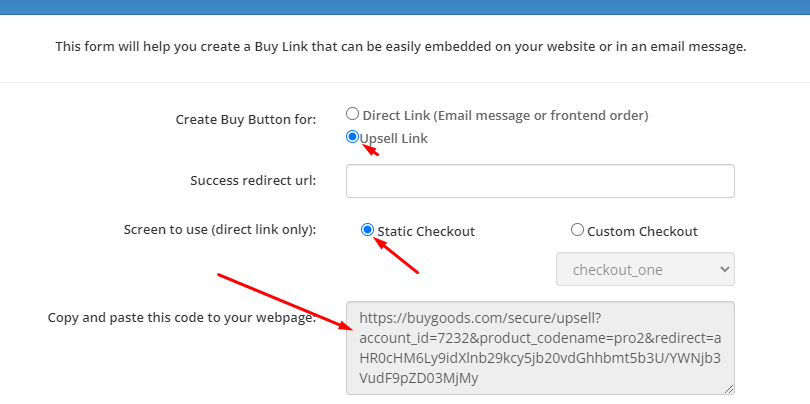
Select "Static Checkout"
The “Direct link" will appear on all frontend products and "Upsell Link" will appear for all backend products.
Using the process above, take the generated buy links and place them directly on the buy button. Keep in mind you cannot pass the link through and <img src=
Add the tracking code to the page.
The sessid parameter is stored in the cookies first and then appended to the buy link.
You will have to dynamically pass the buy links from each product that is selected to the main buy button and then redirect to it.
You should have all the links added on each option (not as URL) on the page, grab it, and send it to the buy link when you click on them.
Adding the BuyGoods Disclaimer
The BuyGoods disclaimer must be on every page also BuyGoods Disclaimer (must be on every page.)